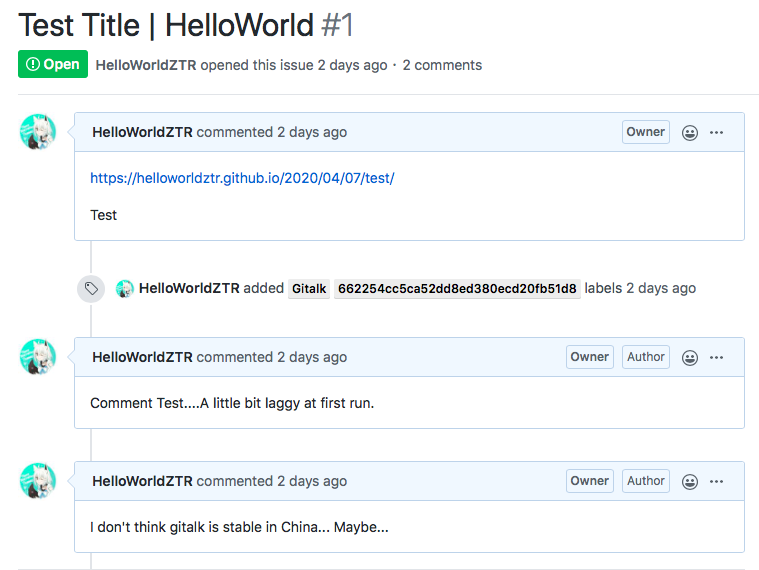
上一篇说了基本的静态博客搭建,这里补充一下评论系统的使用方法。
为什么
上一篇文章说过,静态博客就只是一堆 html 页面,并没有后台,自然也不能响应动态请求。而评论需要有存储、响应请求……自然是不能实现。
然而并不是不能实现,serverless无服务器的技术可以帮我们解决这个难题。Gitalk 是一个 js 插件,能使用Github账号来登陆,并将用户的评论转为 issue 存到仓库里。又剩下了一笔资金是不是。更方便的是它不需要备案就可以直接使用。
怎么做
首先你得有个 Github 账号(都用 Gitpage 了怎么就没有 GitHub 账号)
其次你的主题最好支持配置 Gitalk,就省的写代码了。
类似如下这样
gitalk: # gitalk. https://gitalk.github.io/
    owner: HelloWorldZTR #必须. GitHub repository 所有者,可以是个人或者组织。
    admin: HelloWorldZTR #必须. GitHub repository 的所有者和合作者 (对这个 repository 有写权限的用户)。
    repo: HelloWorldZTR.github.io #必须. GitHub repository.
    ClientID: #必须. GitHub Application Client ID.
    ClientSecret: #必须. GitHub Application Client Secret.
注册 OAuth 应用
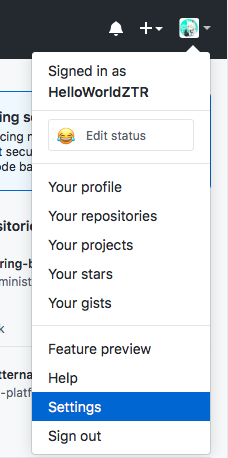
你的头像- Settings
点击 Developer Settings (最下)
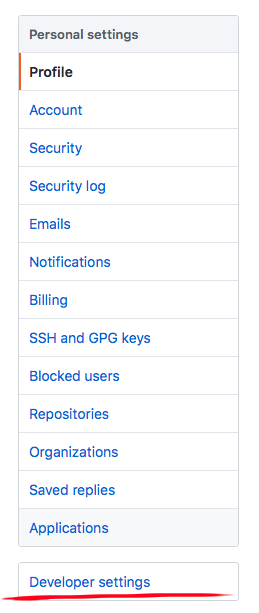
选择 OAuth Apps 并新建一个 OAuth App

填写表格
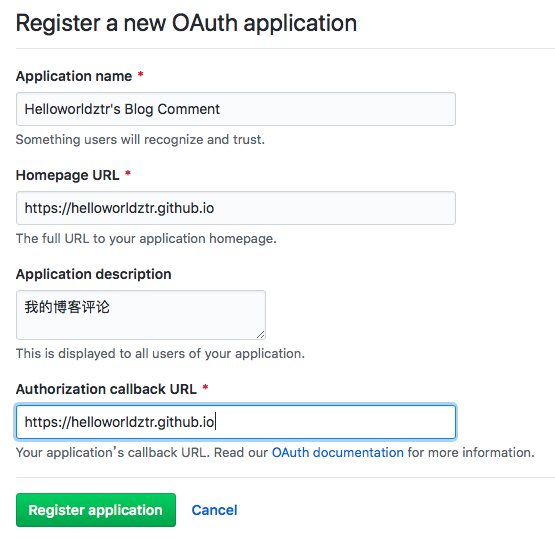
- Application name: 应用名,用户在使用 Github 账号登陆时可以看到。要可信,明确用途,我是博客评论就写blog comment
- Homepage URL: 博客网址,没得说
- description可以写,也可以不写
- Callback URL:登陆后跳转到的 URL 和博客地址相同即可
添加评论
复制他给你的两个 ID 填写到你的配置文件里(themes/xxx/_config.yml)

gitalk: # gitalk. https://gitalk.github.io/
    owner: HelloWorldZTR #必须. GitHub repository 所有者,可以是个人或者组织。
    admin: HelloWorldZTR #必须. GitHub repository 的所有者和合作者 (对这个 repository 有写权限的用户)。
    repo: HelloWorldZTR.github.io #必须. GitHub repository.
    ClientID: xxxxxxxxxxxx #必须. GitHub Application Client ID.
    ClientSecret: xxxxxxxxxxxxxx #必须. GitHub Application Client Secret.
重启一下服务器
应该能看到这样的东西
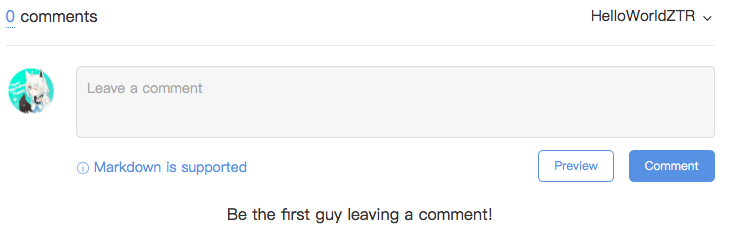
(登陆可能有点慢,刷新一下就不会显示 Network Error 了)
发一条评论,应该可以看见 issue 了
